ICEINSPACE

|
Using Astrometrica software for Asteroid Searching
Submitted: Wednesday, 20th August 2008 by Jeff Nott and Scott Alder
Asteroids are an oft-forgotten aspect of the solar system. When people talk of our solar empire they neglect perhaps the most dangerous and numerous bodies in orbit around the Sun. It’s a little like Biologists surveying life on earth and forgetting the ants or microbes, we all know they’re around but never think of them until we see or hear of some. Minor planets provide an opportunity to observe and image real-time events. They are numerous and often change their position rapidly, it is this that makes them so easy to detect or image. Observations can be done from mere observation of their star-like positions, through hand-plotting their changing position on a map with the eye to producing short .gif movies from images. It would be a fair bet that if you’ve observed or imaged, you have seen one of these critters. EquipmentAs with all amateur astronomy there are two main camps, those that observe and those that image. Which is better? –Suit your self. This is an area where optics are better than naked-eye observations. Any optical aid will allow you to observe some asteroids. Binoculars will allow you to track the brighter targets, Dobsonians can be used for optical and photographic observations and equatorial mounted telescopes just make imaging that little bit easier. No matter what’s in the kit, you can start observing. A good planetarium program that plots asteroids will be of benefit if you are deliberately setting out to observe one. This will allow you to not only look in the right area but also decide if your optics will allow you to see its brightness. Failing this, the Minor Planet website will give you positions and magnitudes to plot onto a paper star map. TechniquesVisual ObservationsHere you will need a good star map and the ability to find the area of sky covered by the map, and a set of asteroid positions. Draw a blank field chart and plot the positions of all “stars” down to below the magnitude of the asteroid you want to locate. Do the same after some period of time, 1 day, without looking at the previous chart. When you compare charts the object that has moved should be obvious.
Imaging ObservationsThe electronic age has made the observation of asteroids much easier. Now images can be taken and compared using a computer. This means that they can be found very quickly. Two methods can be used, the “Trail method” and the “Blinking method.
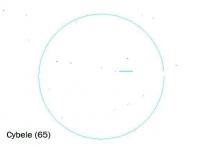
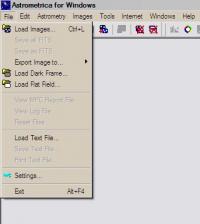
What Images Do I Need to Blink?To find asteroids, the easiest method is to rapidly alternate between images. This will show any moving object jumping between positions. This procedure is known as “blinking”. To do this requires 3 images of any field. My stock images are 10 minutes with 1 minute between. The longer your focal length the shorter the interval. After imaging your target use the images to look for asteroids. I have found that Astrometrica is excellent software for revealing asteroids at a variety of levels. The simplest is as a blinking tool. Astrometrica can be loaded from the web as a 100 day trial-ware program. I strongly recommend registering after this period. Importing ImagesAstrometrica will only accept images in the .fit or .fits format. Other software can be used to transfer most formats into .fit and Scott Alder has provided a section on how to do this later. All images should be fully processed if possible with flats, darks etc., but I usually only process with dark frames. Save them in an easily accessible folder as they are processed. Using Astrometrica for BlinkingOnce Astrometrica has been downloaded and installed, open it. The toolbar should be as this.
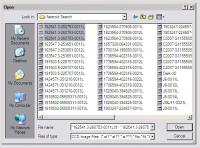
Simply click on file and load images.
From there locate the file containing you images and highlight them. Note that my image names contain information on the center of the field. This, along with the time in the .FITS header, allows for easy asteroid identification with this program.
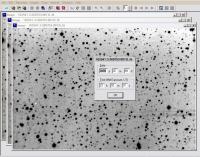
As each image opens it should ask you for the time for the exposure. If it can read this from the header, and is correct click [OK]. If there is no information in the header than leave it as the default. For astrometry of asteroids the time is important.
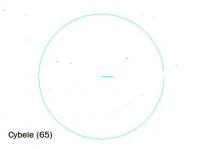
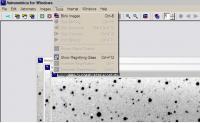
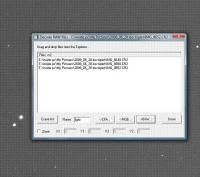
After clicking [OK] and with the images open click on the Tools menu and Blink Images in the dropdown list.
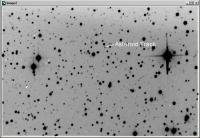
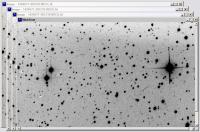
Another window will open. The program will find the patterns on each image and automatically align them and start the blinking process.
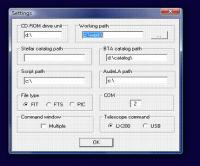
Using IRIS to turn a DSLR RAW file into a .FIT fileTo turn a DSLR RAW file into a .FIT file in Iris, first go to File, Settings, and tick File Type here.
Decode the raw images as normal except use B&W not CFA or RGB, otherwise Astrometrica wont accept them.
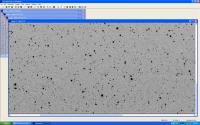
Once this is done you can open Astrometrica and access the .FIT files from the Iris working directory, in my case C:\ work, where they will appear as light1.fit, light2.fit, light3.fit They will of course be larger but one can zoom in while blinking and scroll across and up/down to check the whole image thoroughly.
Once you have “found” your first asteroid it will be hard to stop looking. Welcome to the asteroid club. Article by Jeff Nott (theodog) and Scott Alder (tornado33). Discuss this article on the IceInSpace Forum.
 |
|
||||||||||||||||||||||||||||||||||||||||||||||||||||||||||||