A How-To for Wireless Go-To
| Submitted: Thursday, 10th May 2007 by Dennis Simmons |
This article has been read 8961 times | Comments |
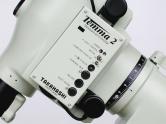
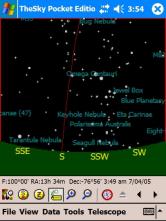
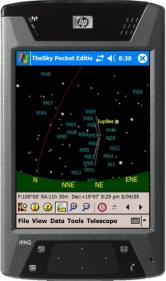
This article provides an overview of how I connected a Pocket Computer (PDA) to my Takahashi EM 200 Temma 2 GoTo mount, using Bluetooth and TheSky Pocket Edition.
Purpose
In 2005 I acquired an HP iPAQ hx4700 PDA with a 640x480 resolution screen and wanted to connect it, wirelessly using Bluetooth, to my Takahashi EM 200 Temma 2 via TheSky Pocket Edition. Why? Well, simply because it can be done, I like gadgets and the Real Estate offered by the 640x480 display was tempting! After acquiring the necessary bits and pieces, it was a relatively simple operation. The steps described herein are waypoints on the journey, rather than a detailed and comprehensive road map of all the set up and integration steps.
Equipment list
Here is a list of equipment and software used in my set up:
- Takahashi EM 200 Temma 2 system GoTo mount and controller (Figure 1)
- TheSky Pocket Edition planetarium software (Figure 2)
- HP iPAQ hx4700 Pocket PC (Figure 3)
- Socket Bluetooth Cordless Serial Adapter (CSA) (Figure 4)
- Null modem (Figure 5)
- RS232 to EM 200 cable (Figure 6)
Please note that this article is not authoratative advice, it is simply a brief description of my experiences. If you choose to follow what I did, you do so entirely at your own risk! I do not guarantee that the products will work as described and it remains your responsibility to follow all instructions, guidelines and safety advice from each Manufacturer / Supplier.
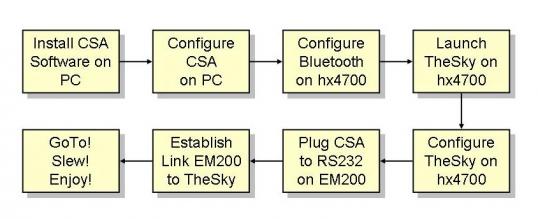
 |
 |  |  |  |  |
 Click to Enlarge Figure 1
 |
 |  Click to Enlarge Figure 2
 |
 |  Click to Enlarge Figure 3
 |
 |
 |  |  |  |  |
 Click to Enlarge Figure 4
 |
 |  Click to Enlarge Figure 5
 |
 |  Click to Enlarge Figure 6
 |
Overview
The flowchart below shows provides an overview of the main steps involved in setting up the system to make the wireless connection.
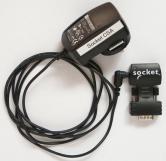
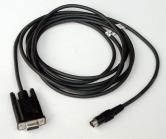
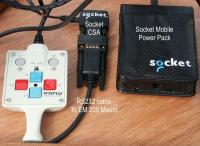
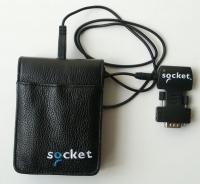
 |
 |
 |
 Click to Enlarge Simple Flowchart showing main steps
 |
Notes
My Notebook computer (IBM Thinkpad R40) does not have a native RS232 Serial Port so I used the Socket Serial I/O Card (PCMCIA) to perform the initial configuration of the Bluetooth serial adapter. In terms of my competence, other than as an end user, I have little knowledge of PDA’s and Bluetooth.
Socket Bluetooth CSA
The first task was to configure the Bluetooth serial adapter.
What is the CSA?
Socket’s Cordless Serial Adapter (CSA) with Bluetooth Wireless Technology eliminates the conventional RS-232 serial cable, providing an easy-to-use, invisible connection. This tiny adapter allows any device with a standard 9-pin serial port to communicate wirelessly with other Bluetooth enabled devices such as a laptop computer or PDA.
Configuring the CSA (one-time) requires the use of the supplied null modem. The neat-looking Socket CSA package is shipped with the following items:
- The Cordless Serial Adapter
- A 9-pin female/female null modem
- An AC power adapter
- A Socket Cordless Serial Adapter Installation CD
Configuring the CSA is a simple, 5 step process:
- Step 1: Install the software.
- Step 2: Attach the CSA to your computer.
- Step 3: Prepare communications settings.
- Step 4: Configure the CSA.
- Step 5: Attach the CSA to the EM 200 Temma 2 RS232 cable.
Install CSA software on PC
Running the CSA Configuration Utility consists of installing the SW from CD onto your desktop or Notebook PC, then connecting the CSA to your PC’s RS232 Serial Port via the supplied null modem. As most modern Notebook computers do not have a native RS232 Serial Port, I’ll mention that I have used the following Ports to program the CSA:
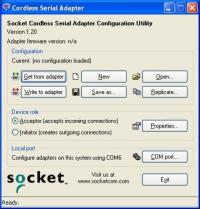
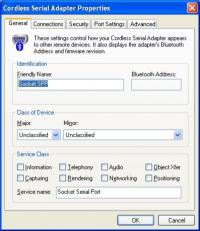
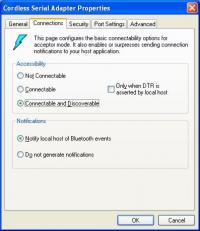
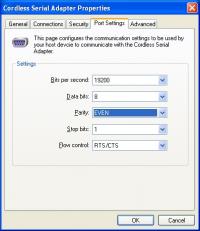
- COM1 - native RS232 Port on my desktop PC.
- COM6 – via a Socket Serial I/O Card (PCMCIA) which provides an RS232 Serial Connector for my non-RS232 Notebook PC.
- COM5 – via a USB2 to RS232 adapter on non-RS232 Notebook PC.
Configure CSA on PC
After installing the SW, launch the Configuration Utility and Figure 7 should display. From here we get details from the adapter and write the settings to the adapter.
Figure 8 shows the default settings under the <General> Tab.
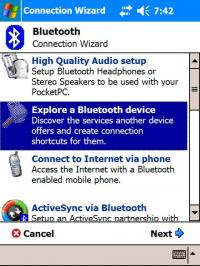
Figure 9 shows the default settings under the <Connections> Tab.
Figure 10 shows the <Port Settings> Tab with settings for the EM 200 Temma 2, which are as follows:
- Bits per second = 19200
- Data bits = 8
- Parity = EVEN
- Stop bits = 1
- Flow control = RTS/CTS
 |
 |  |  |
 Click to Enlarge Figure 7
 |
 |  Click to Enlarge Figure 8
 |
 |
 |  |  |
 Click to Enlarge Figure 9
 |
 |  Click to Enlarge Figure 10
 |
HP iPAQ hx4700
The next task was to prepare the hx4700 PDA by running the Bluetooth Wizard to install the serial port service on the PDA. Here is a brief description of the hx4700 operations.
Configure Bluetooth on hx4700
Figure 11 shows the Bluetooth Connection Wizard on the HP iPAQ hx4700 which I used to create a connection shortcut for the socket serial port.
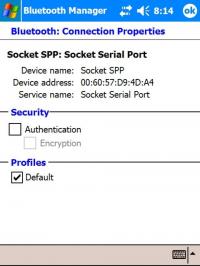
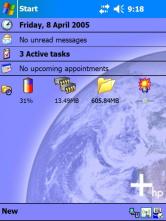
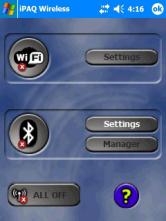
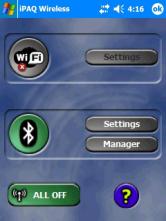
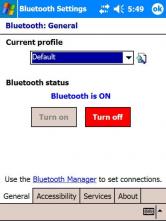
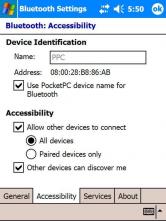
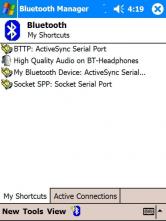
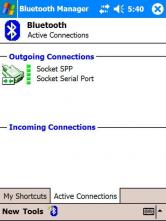
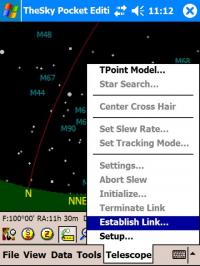
Figure 12 shows the Bluetooth: Connection Properties panel after the CSA had been added.
 |
 |  |  |
 Click to Enlarge Fiogure 11
 |
 |  Click to Enlarge Figure 12
 |
Bluetooth Operations
Figure 13 - From the Start screen, <Tap> the Bluetooth wireless icon (bottom RH corner).
Figure 14 - The iPAQ Wireless screen will display.
The Settings Button will be active (white text).
The Manager Button will be inactive (black text).
Figure 15 - <Tap> the BT button which should turn green.
<Tap> the Settings Button to display;
Figure 16 - General Tab when Bluetooth is active.
Figure 17 - Accessibility Tab with Bluetooth active and CSA detected (note the Address field will display “Unavailable” when the CSA has not been detected and the device MAC address will be blank).
Figure 18 - Services Tab showing “Serial Port” checked as “Enable service”.
Figure 15 - <Tap> the Manager Button to display;
Figure 19 - My Shortcuts Tab showing “Socket SSP: Socket Serial Port”
Figure 20 - Select Connect to “Socket SSP: Socket Serial Port”
Figure 21 - Active Connections Tab showing Outgoing Connection to “Socket SSP: Socket Serial Port”.
This completes the Bluetooth set up operations. We can now move on to TheSky PE.
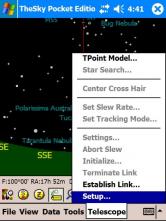
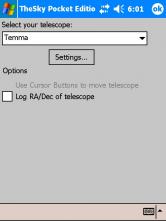
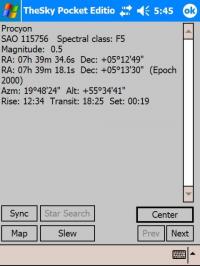
 |
 |  |  |  |  |
 Click to Enlarge Figure 13
 |
 |  Click to Enlarge Figure 14
 |
 |  Click to Enlarge Figure 15
 |
 |
 |  |  |  |  |
 Click to Enlarge Figure 16
 |
 |  Click to Enlarge Figure 17
 |
 |  Click to Enlarge Figure 18
 |
 |
 |  |  |  |  |
 Click to Enlarge Figure 19
 |
 |  Click to Enlarge Figure 20
 |
 |  Click to Enlarge Figure 21
 |
TheSky Pocket Edition
The following describes operations for TheSky PE Version 1.10.014 with the EM 200 Temma 2.
Configure TheSky on hx4700
<Tap> TheSky PE on the hx4700 to launch the application.
Figure 22 - <Tap> Setup… from the Telescope Menu.
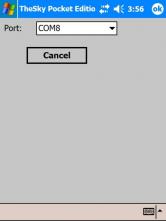
Figure 23 - Select Temma as your telescope and click Settings…
Figure 24 - Select COM8 as the Port:
 |
 |  |  |  |  |
 Click to Enlarge Figure 22
 |
 |  Click to Enlarge Figure 23
 |
 |  Click to Enlarge Figure 24
 |
Plug CSA to RS232 on EM 200
Connect the RS232 cable to the EM 200. Note that for Bluetooth operations, I had to short pins 7 & 8 of the RS232 connector. This did not affect normal wired operations. Connect the CSA to the RS232 connector and plug in the CSA power adapter.
Figure 25 - Select Establish Link… from the Telescope Menu.
Figure 26 - TheSky should now display with the cross hairs showing where the telescope is pointing (If the telescope has been initialised properly).
Figure 27 - Selecting an object displays the Menu with the Slew button.
Figure 28 - EM 200 Hand Paddle, CSA & Mobile Power pack. Note the MPP cable plugged into the left hand side of CSA.
 |
 |  |  |
 Click to Enlarge Figure 25
 |
 |  Click to Enlarge Figure 26
 |
 |
 |  |  |
 Click to Enlarge Figure 27
 |
 |  Click to Enlarge Figure 28
 |
Lessons Learned
- EM 200 to RS232 cable: For Bluetooth operations, I had to remove the DB9 connector shell on the EM 200 to RS232 cable assembly and solder a wire across pins 7 & 8 to connect them together. For wired operations, there is no requirement for shorting pins 7 & 8 on the EM 200 to RS232 cable assembly.
- COM ports: Clearly identify which COM ports are used by your PDA for wired or wireless serial connections. On my hx4700, these were COM5 (wired) and COM8 (wireless ) for establishing a wired or a wireless connection respectively, with TheSky PE and the EM 200.
Enhancements
- PDA battery: To increase battery operations, the standard 1800mAh battery of the hx4700 can be replaced by the (bulkier) 3600mAh extended battery.
- CSA power: To free you from the need to have access to mains power, Socket also sells a 7200mAh Lithium Ion Mobile Power Pack that can power the Socket CSA (see Figure 29).
 |
 |
 |
 Click to Enlarge Figure 29
 |
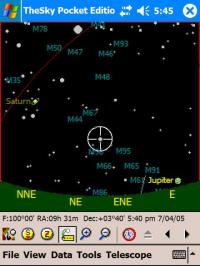
That’s it folks, a simple 1-2-3 on how I connected my PDA to the Takahashi EM 200 Temma 2 using TheSky Pocket Edition on a PDA via Bluetooth.
Costs
Here is a list of the costs involved in implementing this wireless connection mode of operation.
| Product |
Price |
| TheSky Pocket Edition |
US $50.00 |
| HP iPAQ hx4700 |
$750.00 |
| Socket CSA |
$215.00 |
| HP 3600mAh extended battery |
$130.00 |
| Socket 7200mAh Mobile Power Pack |
$180.00 |
Links
Miscellaneous
- Harald Bluetooth, a Viking and king of Denmark from the years 940 to 981, was renown for his ability to help people communicate. During his reign, he united Denmark and Norway.
- In 2007 I upgraded TheSky PE to Version 1.10.015 and this proved seamless; that is, everything worked as it did under the previous version.
Article by Dennis Simmons (Dennis). Discuss this article on the IceInSpace Forum.
|