ICEINSPACE

|
Dew Shields for 20x80 Triplet Binoculars
Submitted: Monday, 21st August 2006 by Alan Sheehan
The first night I had my 20 x 80 T binoculars out I realised I needed to make dew shields for them. More accurately what I needed was stray light shields, but they will double as dew shields too. My home suffers from chronic streetlightitis, and any time I tried to view objects within maybe 10 to 15 degrees of a light, stray reflections and flare would wipe out any contrast, if not the entire view. Looking down the binoculars through the objective lenses shows several relatively shiny surfaces in the optical path, so keeping stray light out of the binoculars will only enhance their performance. Materials
Tools Required
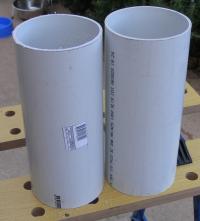
MethodThe outside diameter of the objective lens cells on the 20 x 80T’s is about 100.5mm with 3 circumferential ribs that measure about 101.5mm diameter. This proved to be a bit of a disappointment to me as I have a full length of 90mm stormwater pipe lying around home looking for something useful to do. It just wasn’t up to the task. A trip to Bunnings found they had 1 metre lengths of 100mm diameter DWV PVS pipe. This has an inside diameter of 103mm – practically perfect for my needs. This pipe is quite robust. It has a wall thickness of about 3mm so it is way stronger than I need, but the inside diameter, and its availability, was just what I needed. A 1m length cost me $14.40, and is enough to do dew shields for 2 pairs of 20 x 80 binoculars, so if you have a mate with the same binoculars, see if you can go halves. Start by marking out your cut lines. To do this I set an adjustable carpenter’s square to 249mm and used this to mark my cut line parallel to the end of the pipe. If you don’t have an adjustable square, mark the distance from the end in a few places around the circumference, then use a flexible straight edge (like the edge of a manila folder, or even a sheet of paper, for example) wrapped around the pipe to mark the cut line. I chose 249mm to allow for the saw cut so I could get 2 pairs of dew shields from the one length of pipe. Check your measuring and marking out before you cut! Rather than cut right through the pipe, just cut through the wall, then rotate the pipe a bit at a time, to make it easy to follow your cut line. If you try to cut all the way through, you may find you’ve followed your cut line on one side of the pipe but not the other! Next, dress up the ends of the pipe with a smooth file. Once the ends are square and smooth, use the 180 grit wet or dry to sand the pipes both inside and out. This will ensure a uniform surface finish between the cut surfaces and uncut surfaces of the pipe, remove any marks and scratches from the outside of the pipe, and roughen up the smooth inner surface of the pipe to help reduce reflections. When sanding inside the pipe try to sand in a circumferential direction or in a circular motion, not along the length of the pipe. This will help to ensure any stray light is scattered effectively and not reflected down the optical path.
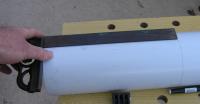
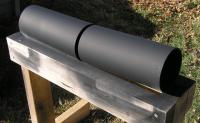
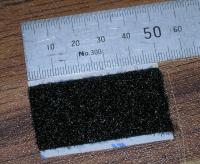
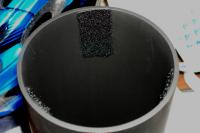
With the sanding done, you will no doubt find you have a problem. Dust from the sanding process and static electricity making it seemly almost impossible to clean the pipe for painting. To clean the pipe, wash it under running water only. This will both disperse the static electricity and wash off the dust. Allow the pipes to air dry before painting. Figure 3 shows the set up I used for painting of the dew shields. The biggest challenge of the painting process is to paint the inside of the pipe uniformly and without runs. Paint the inside first, aiming about 1/3 the way into the pipe. Overspray from one pipe travels through to the next pipe in this set up and it all helps to achieve coverage. Work around the pipe in small sections, then end for end the pipe and do it again. Repeat the process with the other pipe. Once the insides of the pipes are painted, do the outside. Paint what you can access then allow to dry. Turn over and complete the remaining outside surfaces. After drying apply a second coat both inside and out. To secure the dew shields to the binoculars I chose to use three strips of adhesive Velcro loop material. Cut three strips each 50mm long for each dew shield. Place them equally around the circumference of one end of the tube, as shown in figure 5. These strips allow a firm fit between the binoculars and the dew shield without damaging the binoculars.
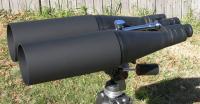
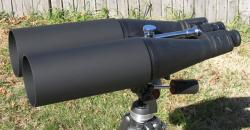
Figure 6 shows the completed dew shields installed on the binoculars. As there is plenty of space between the dew shields and the optical path, you can add further light baffling enhancements to the inside of these dew shields if you prefer. For example, rings of adhesive draft excluder strip, or Velcro loop material, etc could be regularly spaced down the tube to block reflections. Alternatively the whole inner surface could be lines with flocking, velvet or felt to kill any reflections. These dew shields will help the 20 x 80 T binoculars achieve their full potential by not just shielding the objective lenses from dew, but also by minimising stray light entering the binoculars.
 |
|
||||||||||||||||||||||||||||||||||||||||||||