ICEINSPACE

|
Adding a Webcam to your Telescope
Submitted: Thursday, 27th September 2007 by David Childs
Many of us have wanted to capture that great lunar or planetary image to share with friends, or just use as wallpaper on a PC. There are plenty of FAQ on the Web covering image processing but this project goes back to the basic steps; how to get the image in the first place. What you need:
Modify the webcamWhat we are after is the CCD image sensor from the camera, the actual chip that does the conversion of the analogue signal (the light) into the digital pulses that make up our final image. So first, some surgery:
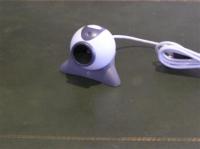
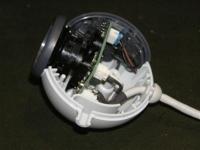
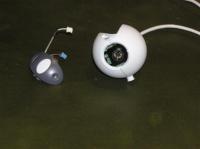
This is our starting point. To get it open, you may be able to unscrew the housing or you may have to cut it open. If the latter is needed, I have found a fine coping saw blade or better still one of the small tools by Dremel work very well. The main thing is to get it open without damaging anything inside. Once that is done, we have something like this:
In this particular camera, we have two surplus connectors for the shutter release and the microphone. All we want is the main board itself and the attached CCD chip. Remove the board from the shell and unclip any extra connectors, then remove the lens that is fitted. On the Logitech cameras with is a rather crudely machined plastic screw thread, just unscrew until it comes off.
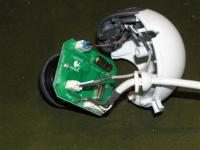
In the photo above on the right you can clearly see our prize; the CCD chip and associated electronics. The next step is to put is all together again so the electronics are protected and the whole unit is a bit more robust. Since the camera we are using here has a screw together housing that was simple.
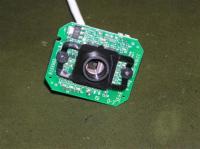
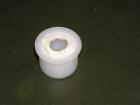
Now for the next bit, mounting the camera to the telescope. Mount the modified camera to your telescopeFor lunar or planetary imaging, we are using the prime focus of the scope only, sometimes using a 2x Barlow. This means that we need to mount the camera directly to the focuser and that is where the rubber doorstop comes in. What we need is in fact the mounting block for the doorstop as it just so happens that this piece of plastic is a perfect fit for the focuser on my telescope. Of course you can substitute anything you like or have handy here; a 35mm film can is a good choice, some small food container would also do. Drill a hole in your chosen mounting block to suit the size of the CCD chip and still leave enough plastic in place for a secure mount. I chose the quick and dirty method of electrician’s tape to secure my camera though you may decide to be a bit more fancy.
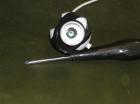
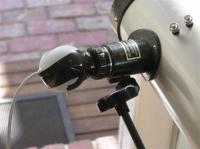
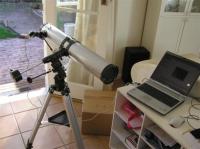
Note the CCD is clearly visible in the last photo. Finally, time to mount the camera to the focuser. On the left below is the camera mounted to my f7 / 130mm telescope. On the right is the whole setup.
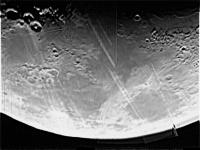
One nice thing about the Logitech cameras is that they come with about 2 metres of USB cable making connection to the laptop easy. Now you’re all set up, start following instructions for capturing and processing images using the article Planetary Imaging and Image Processing, and you will then get something like this.
This very poor image, complete with all the marks and strange tracks was the very first CCD image I captured with this setup. Hopefully with some practice and a bit more adjusting I will come up with a better result. Article by David Childs (uspl). Discuss this article on the IceInSpace Forum.  |
|
||||||||||||||||||||||||||||||||||||||||||||||||||||||||||||||||