|
10 foot Home Dome
Submitted: Tuesday, 19th February 2008 by Dr Dietmar Hager
Review of Technical Innovations 10 foot Home Dome
 |
 |
Click to Enlarge
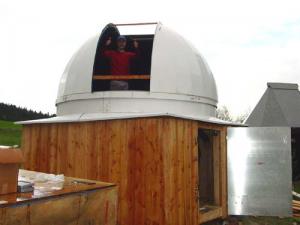
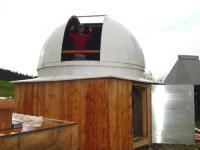
Technical Innovations 10 foot Home Dome
|
Packing Crate, Transportation and Vendor’s Compliance
Jerry W. Smith handled all my requests and technical specifications for the HD 10 in a professional and detailed manner. All additional questions and issues were addressed promptly and to my satisfaction.
Though the delivery address was different than the billing address, there was no delay or problems in shipping the dome to its new home. Jerry was a most professional and competent partner, interested in being informed personally about the entire transportation progress. I really appreciate this- Thanks Jerry!
|
 | |  |
Click to Enlarge
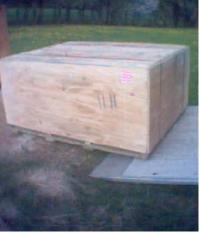
The crate for the HD 10
|
|
Click to Enlarge
The crate for the HD 10
|
The crate was very stable and solid. It gave great shelter for the precious goods inside.
Assembly
Jerry sent a detailed manual prior to the arrival of the HD enabling us to prepare the tools required for assembly. The entire process took only a couple of hours.
|
 |
|
Click to Enlarge
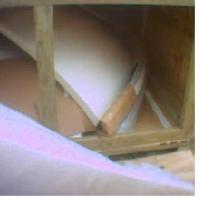
The four elements of the base ring were watertight when screwed together, a testament to the roundness and precision of the parts.
|
|
 |
Click to Enlarge
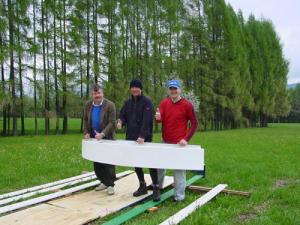
The rectangular skirt adapts the round dome to a rectangular construct like mine
|
 |
|
Click to Enlarge
Water Tight
|
|
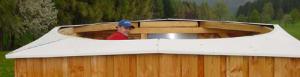
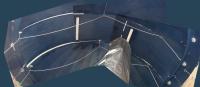
The two elements that comprise the dome were also watertight after the screws were set in place. An additional seal made the flange impervious to the elements.
The Shutter
The shutter consists of three elements. The ‘Rear Shutter Element’ controls the two halves of the dome. The shutter provides the observatory with a 36.6” wide opening, extending 15° beyond the zenith.
Though an electrical opener/shutter is available from Technical Innovations, I decided to create a simple manual version with ropes and pulleys. Polyethylene pads (PE) are attached to the sliding portion of the front-third of the shutter. Spraying on some silicon oil made it open very easily as seen here.
|
 | |  |
Click to Enlarge
Felix, my 3 year old son is capable of opening the shutter when the shutter once the locking mechanism is released
|
|
Click to Enlarge
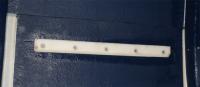
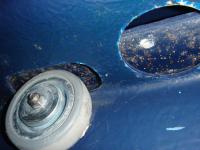
one PE horizontally attached element of the locking mechanism (5 screws)
|
|
 | |  |
Click to Enlarge
The shutter locking mechanism is very reliable and keeps the shutter closed even if the dome is exposed to heavy storms outside
|
|
Click to Enlarge
The shutter locking mechanism is very reliable and keeps the shutter closed even if the dome is exposed to heavy storms outside
|
|
 |
Click to Enlarge
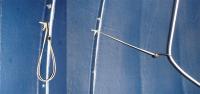
Rope `n`roll mechanism of the manual opening mechanism.
|
|
 |
Click to Enlarge
The shutter lets rope n roll
Locking mechanism of shutter system
|
Since my observatory is entirely run on solar energy I had to spare an electric opener. So I decided to create a very simple opening mechanism for the shutter. the ropes for opening up and shutting down have 2 rollers on each side.
|
 | |  |
Click to Enlarge
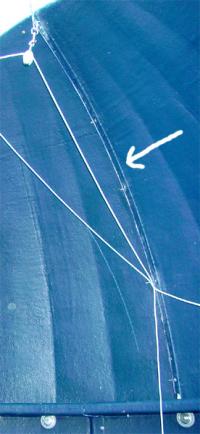
The top-rollers in place (top of the dome) guiding the rope. Most stable and reliable.
|
|
Click to Enlarge
Thin cable with hook to hold the rope aside while observing (see above).
|
|
 | |  |
Click to Enlarge
The shutter in locked position
|
|
Click to Enlarge
The shutter-locker
|
|
 |
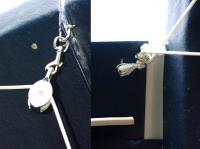
Click to Enlarge
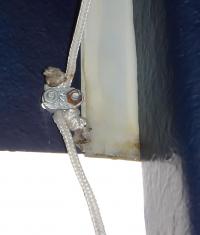
The handle on the front shutter and a heavy eyelet-screw (settled down in the building) with rope and a simple karabiner snap link
|
|
 |
Click to Enlarge
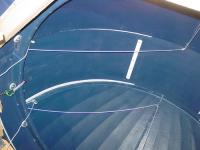
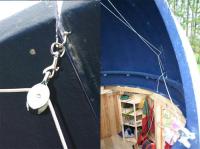
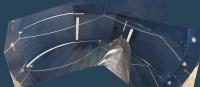
Both ropes must be attached to the front shutter element which is parked in the "open" position in this image
|
Both ropes must be attached to the front shutter element which is parked in the "open" position in this image. This is best achieved by making use of an eyelet-screw-system which forces the 2 rope-ends towards the shutter. Making sure that the sliding surface is not compromised is vital!
 |
|
Click to Enlarge
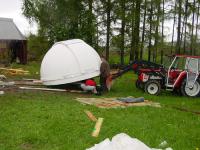
Preparing for installation
|
|
After the dome was assembled on the ground, Gottfried gave it a lift with his tractor. Thanks for your help and advice Gottfried! Your reliability "is as constant as the northern star..." (W.S.) For increased stability the recommended, temporary wooden beams were installed.
|
 | |  |
Click to Enlarge
For better stability the recommended wooden beams were installed temporarily
|
|
Click to Enlarge
Attaching the dome to the base of the observatory
|
I made certain the dome was exactly horizontal using a level before fastening it to the structure with 20 M10/100 mm screws. Though the dome has been installed for more than one year, there has been no loosening of the screws, or any signs of instability of the dome itself despite several heavy storms.
|
 |
|
Click to Enlarge
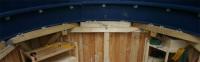
Gritty material to increase friction
|
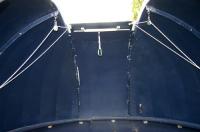
As the dome is perfectly level, I can move it with only 2 fingers! To ensure contact between the (20) rollers that carry the dome and the underside of the rectangular ring, Jerry applies a gritty material to increase friction. To prevent misalignment while rotating, there are several horizontal rollers that keep the dome concentrically in place so a "roll off" can never occur.
|
 |
|
Click to Enlarge
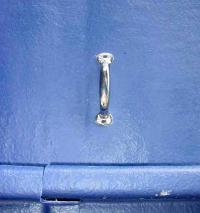
4 handles make it easier to grab the dome in the dark
|
All of the dome’s flanges were sealed with silicone- even the strong winter of 2005-06 didn’t harm it or the instruments inside.
|
 |
|
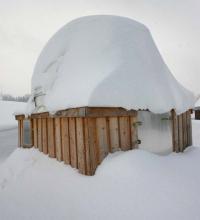
Click to Enlarge
The HD10 withstands heavy snowfall easily
|
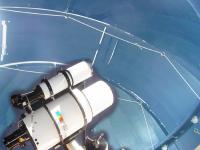
Materials
Jerry uses only high-quality materials. The dome’s outer surface is highly reflective and keeps the inside of the building relatively cool even in summer. The inner surface is a flat, dark blue and absolutely non-reflective, thereby eliminating any annoying reflections. Well-done Jerry!
Conclusion
The HD 10 is a beautiful and very reliable cover for my observatory. In more than one year I have had no problems. I can heartily recommend the HD 10 to anyone seeking an adequate shelter for his instruments!
Resources and Links
Review by Dr Dietmar Hager (Dietmar). Discuss this Review on the IceInSpace Forum.
|


