ICEINSPACE

|
Review of the AstroGazer Observatory
Submitted: Tuesday, 5th August 2014 by John Dolby (Viper326)
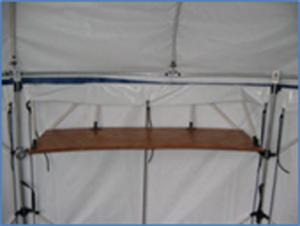
Back in May of 2009 I decided that I needed an observatory as pulling down my CG-5 every other night was becoming a chore and it was eating into my observing time. I looked around and came up with a reasonable priced “temporary” Observatory called the AstroGazer. Reasonably priced and being a temporary item did not require council approval to install. With the strong winter winds experienced in Perth I decided that I needed to bolt the AG into a strong mounting base. So I contacted Jeff at Astrogizmos in the USA and about 10 days later it turned up. I also purchased the upper curved table. See Pic.
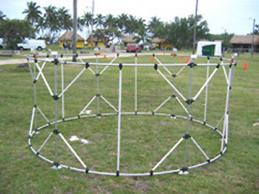
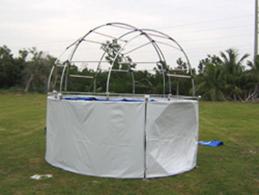
InstallationThe AG comes in 2 rather long wheelie bags, no unlike many sports bags you see today, a good feature given that the AG is portable. Unpacking it was a dream and with all necessary parts confirmed I set about reading the instruction manual. The manual was reasonably clear and concise. The outside of the AG is covered with heavy duty commercial white vinyl tent fabric. By that I mean the sort of canvas (wrong word – sorry) that a commercial circus tent is constructed with. Strong and extremely weather tolerant. The frame consists of tubular aluminium rods and plastic support stays. See a couple of pictures below that I have taken from the AG web site.
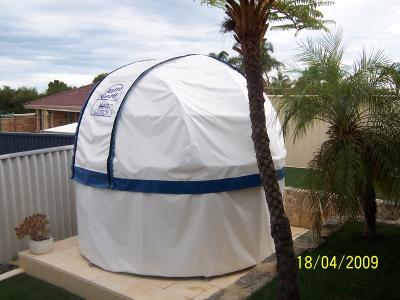
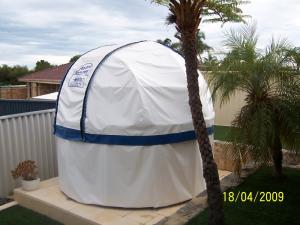
It is important that the frame is laid down on a level surface otherwise the dome part will not freely rotate. All in all it took one person (me) about 1.5 hours to put it up for the first time. I did at one stage have to take it down but the second time I put it up it only took about 45 minutes. Here is the finished product as of April 2009 at my place in Perth.
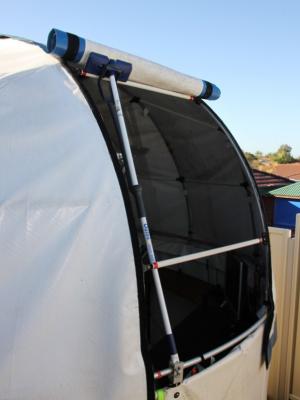
Tools requiredOnce assembled the AG is 3 metres high and 3 metres in diameter, so you will need a good sized ladder to ensure you can reach the top of the AG when installing the heavy duty waterproof hemispheres and opening flaps. In addition a hammer for driving in the restraining pegs (I used dynabolts to semi-permanently fix the frame to the ground). ConsiderationsThis AG is great as a semi-permanent observatory. You will note from the above picture that the AG is sheltered from the effects of strong winds by the house and fences. In this location it has withstood 100kph winds with no damage or loss of bits and pieces. At first I was up most of the night watching to see if it would blow away but after 5.5 years it’s still there and I rest easy now. The AG does not come standard with a floor or a skirt to stop the wind blowing under the dome, although the skirt is available as an option from Astrogizmos. To stop dust etc from getting into the AG I have inserted a self made skirt to keep the dust and wind out. I purchased a few “pool swin noodles” from a cut price store at about a $1 each and pressed them under the AG making a quite good seal against the weather. If you intend to use the AG as a protable tent at a Star party etc then I strongly recommend buying heavy duty tent pegs and use them is anchor the AG well into firm ground in asheltered position if possible. In addition I have added some tie down straps to hold the dome securely to the frame during expected severe weather conditions. There is plenty of room inside the AG to sleep if you wanted to do so and camping in it would generally be a good experience in reasonable weather. Wear and TearIn general the AG has withstood the test of time and frequency of use well. The only issue is with the effect harsh Australian sun has on the opening flap which is a Velcro flap that rolls up. While the hook section of the Velcro is in good shape the loop (soft part) is exposed to the elements and loses its grip over time. Jeff at AstroGizmos has been very helpful and sent me a new opening flap a year or so back, but it also is starting to lose its grip. It’s a minor problem which can be offset by inserting a Squeeze mop against the part open flap until you can get inside and compete the opening of the flap by hand from the ladder. See the picture below.
The life of the hemispheres (dome section) is about 5 – 6 years by the look of it as I am starting to have to patch sections of it where there are rub marks on the inside as the dome is turned. Tips
Pros
Cons
 |
|
|||||||||||||||||||||||||||||||||||