ICEINSPACE

|
Collimation Using a Barlowed Laser
Submitted: Tuesday, 6th November 2007 by Dennis Greeve
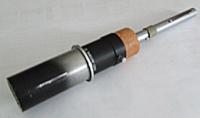
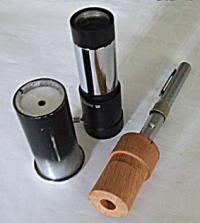
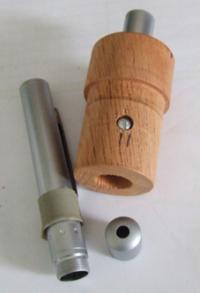
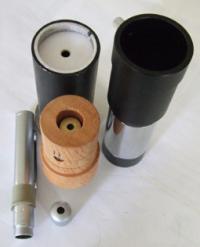
The American Sky and Telescope magazine January 2003 published an article by Nils Olof Carlin: Collimation with a Barlow Laser. Reading the success of this method of collimation and the submission by a member in IceInSpace who purchased one from USA, gave me the idea of making a similar one using a laser pen. Using the shortest of my focus tubes, a short length of the same aluminium tube was used as a split ring to hold the disc of white card pieced with a 5 mm hole punch and dropped onto the split ring. A wooden plug turned accurately to slide into the 2x Barlow and bored accurately - not drilled - to accept the laser. I’ve emphasized the word accurate because unless made so it will not give an accurate collimation. The end cap to the laser pen that I purchased for the laser finder previously described in IceInSpace, is not accurately made and casts its beam slightly to one side. This was corrected by shining the beam onto a wall and carefully packing the tube until the concentrated beam was central to the displayed circle of defused light. Giving this further thought I made a small additional change to the design so that the laser beam could be adjusted accurately and remains so for future use and feel this was worth the extra effort. TThe wooden cylinder was returned to the lathe and the bore increased by 2mm for 2/3rds of its length from the bottom end, leaving 1/3 of the original bore to support the laser tube. Three equally spaced holes are drilled and counter bored for the heads of three small self tapping Centering the beam When the assembled device is switched on and shone against a non reflective surface at a meter or so, a dim circle of defused light is seen and the laser beam is adjusted with the three The slightest inaccuracy within the focuser, such as side movement of the focal tube will displace the reflected primary mirror’s central spot I have previously used a simple pinhole sighting tube for collimation and comparing it with the Barlow Collimator, I found the Barlow to more positive.
 |
|
||||||||||||||||||||||||||||