ICEINSPACE

|
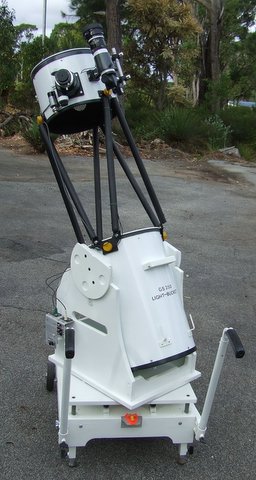
GS 250mm Light Bucket
Submitted: Thursday, 10th April 2008 by Dennis Greeve
The 200mm truss mounted scope I had previously built, following the Kriege and Berry’s manual, although a magnificent instrument, it is somewhat heavy and difficult to transport in the family Toyota Echo. To obtain better viewing than that so frequently disappointing on the south coast, I required a scope that was reasonably easy to knock down and transport to clearer sky. The Meade Light Bridge impressed me, but its cost, plus freight made it impossible and what is more, I enjoy building a scope and improving it to perfection and with this in mind I contemplated purchasing a 300mm. Super Deluxe GS telescope from Andrews Communications and modifying it. The freight cost was not excessive and it had all the features to build a truss mounted Dob. Lee Andrews kindly supplied measurements enabling me to produce full size sketches and plan how it could be rebuilt, but its size defeated transportation and I eventually settled for the 250 Super Deluxe, which arrived in perfect condition six days after ordering it. Increasing the elevation bearing diameter, the mounting base was reduced in height providing greater stability – the original base and plastic bearings were discarded and a new base was constructed from 15 mm MDF with thought to weight and over all size. The scope was dismantled and each component including the steel tube weighed and the over all balance point calculated as near as possible. - All Dob scopes require additional balance weights to correct the addition of the extras we hook onto them, especially when viewing at a low angle. - My 200 mm scope occasionally requires a 1.0 kilo or a 1.5 kilo weight to balance it, so as long as I didn’t need to provide any greater weight I was happy with my calculations and cut the tube into three parts, discarding the central section. I would have liked to have made the primary mirror bucket shorter and if I had remade the secondary mirror top section using aluminium to reduce the weight, it could have been shortened by 50 mm, but this would have increased cost and as the bucket can be accommodated in the vehicle, I accepted its finished size. A curved 25mm x 3.5mm aluminium reinforcing is riveted on the inner face to the cut edges to maintain the tube shape with a neat rubber molding covering the cut edges of both sections giving it a professional look and making it comfortable to handle.
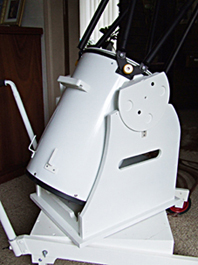
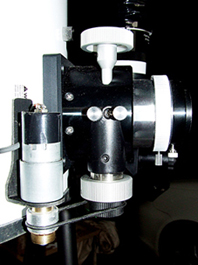
When one contemplates building a scope and purchasing mirrors and optics there exists a degree of anxiety as to the quality of the components until the finished scope receives its first light. Owning a telescope that has proved to be successful I was reluctant to steal from it with the thought in mind that should the new scope fail, I’d still have a scope. I didn’t wish to rebuild the equatorial platform or leave the first scope without means of transportation around the home yard so a new movable base for the platform to accommodate the new scope was made with consideration to its weight and the leveling facility, which folds down to reduce size. The new scope has proved to be equal in quality to the 200 mm scope although better atmospherics than we had for the tests will provide even better results. The larger mirror sure makes a difference for detail. Being a three-truss design, 25 mm x 1.6 mm aluminium tubing was chosen for the trusses for rigidity and a lot of thought was given to the truss attachments so that collimation is maintained when it is broken down and reassembled. I’m not in favour of squashing the tube ends and use a method of filling the tube ends and screwing an aluminium angle section to each. Having had success with this method on the previous scope and because it keeps the trusses outside the light path, I repeated it. The locking down knobs are made from three layers of Perspex with a ¼ inch Whitworth nut inbedded in the center layer. They are light in weight and easy made. Two items that are interchangeable with both scopes, the first being the illumination collar that slides over either finder scope and the second, the Laser finder with its simple attachment. The magnificent 10:1 focuser has been fitted with the small electric motor and remote focus controller. To focus from the computer without touching the scope is a must.
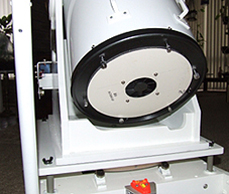
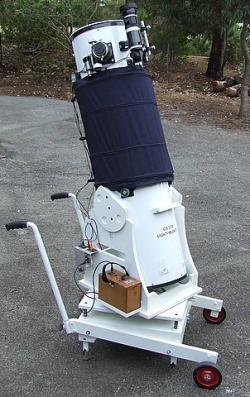
The Bucket is fitted with handles for ease of lifting and weight clips for the balance. The fan, which comes bolted to the primary mirror support, wasn’t moving the air around the mirror. To correct this, a simple cover made from Formica sheet with a foam seal around it allows the air to be drawn from above the mirror and expelled at the fan. Two new ply wood covers were made, one seals the bucket and the second covers the top section when not in use. Note the four spring steel wire supports holding the cloth out of the light path, thanks to my wife's skill with a sewing machine. Cost to modify the telescope, not including the new platform base, $55 and this could be reduced by using the original base (chip board) material.
Article by Dennis Greeve (Dennis G). Discuss this article on the IceInSpace Forum.  |
|
|||||||||||||||||||||||||||||